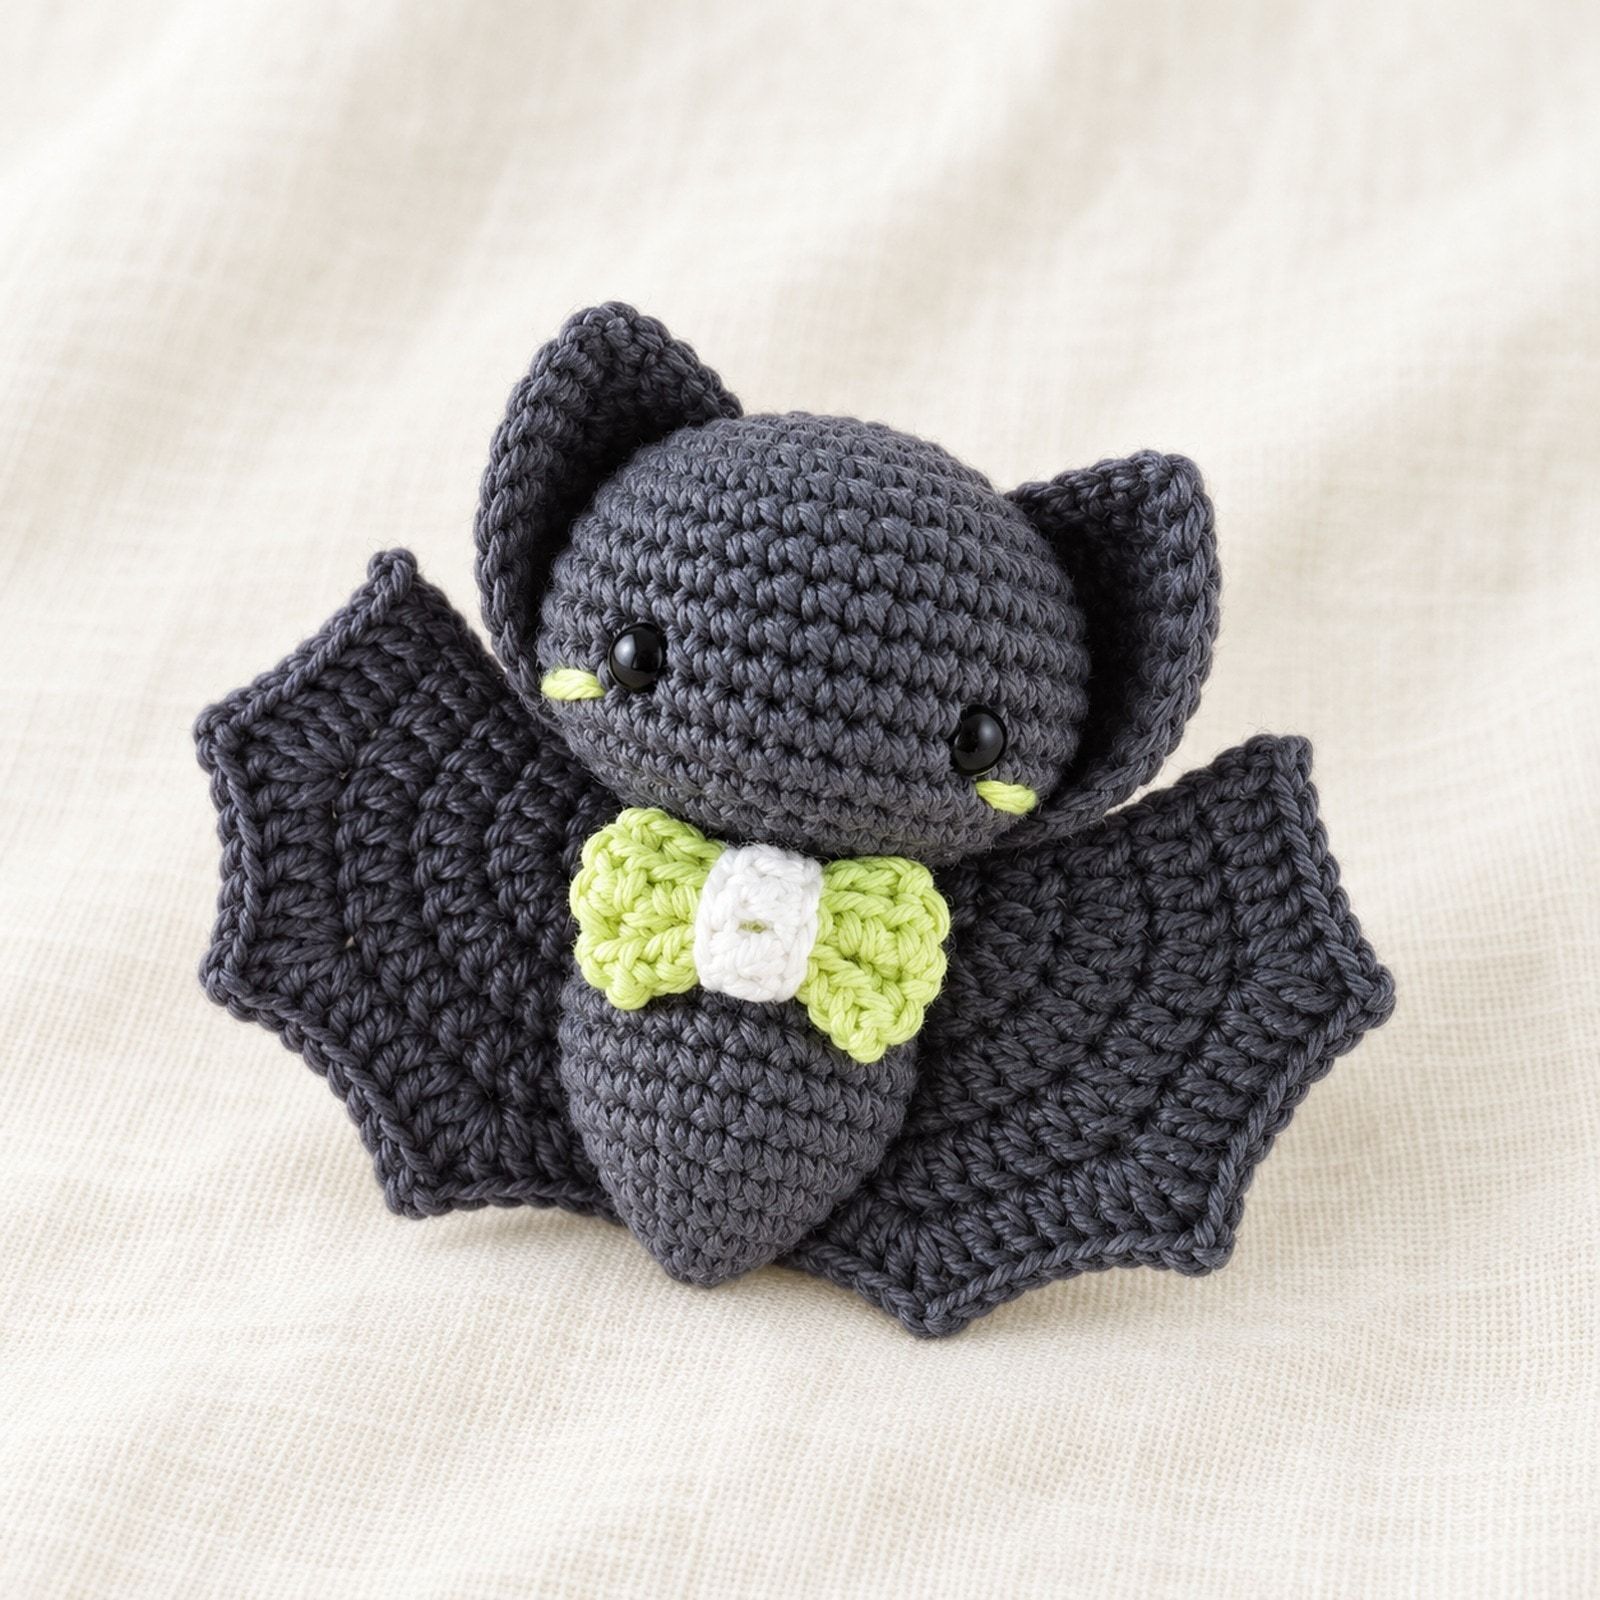
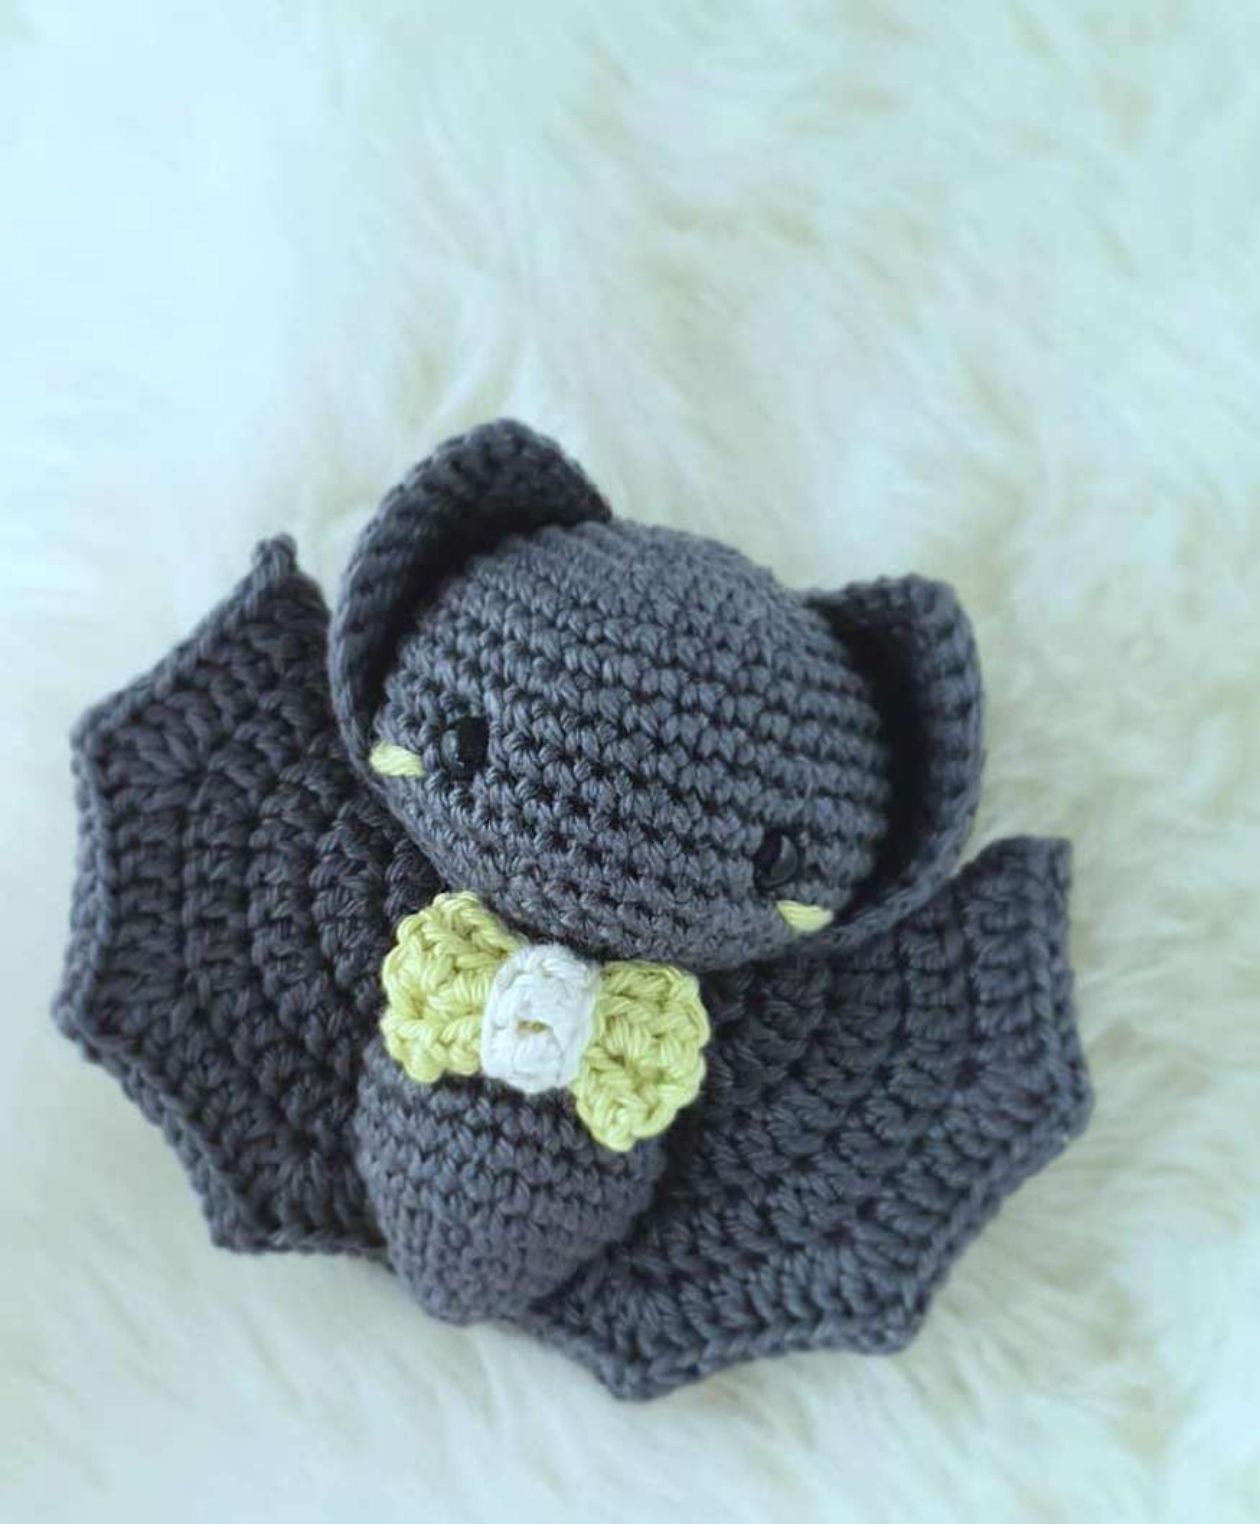
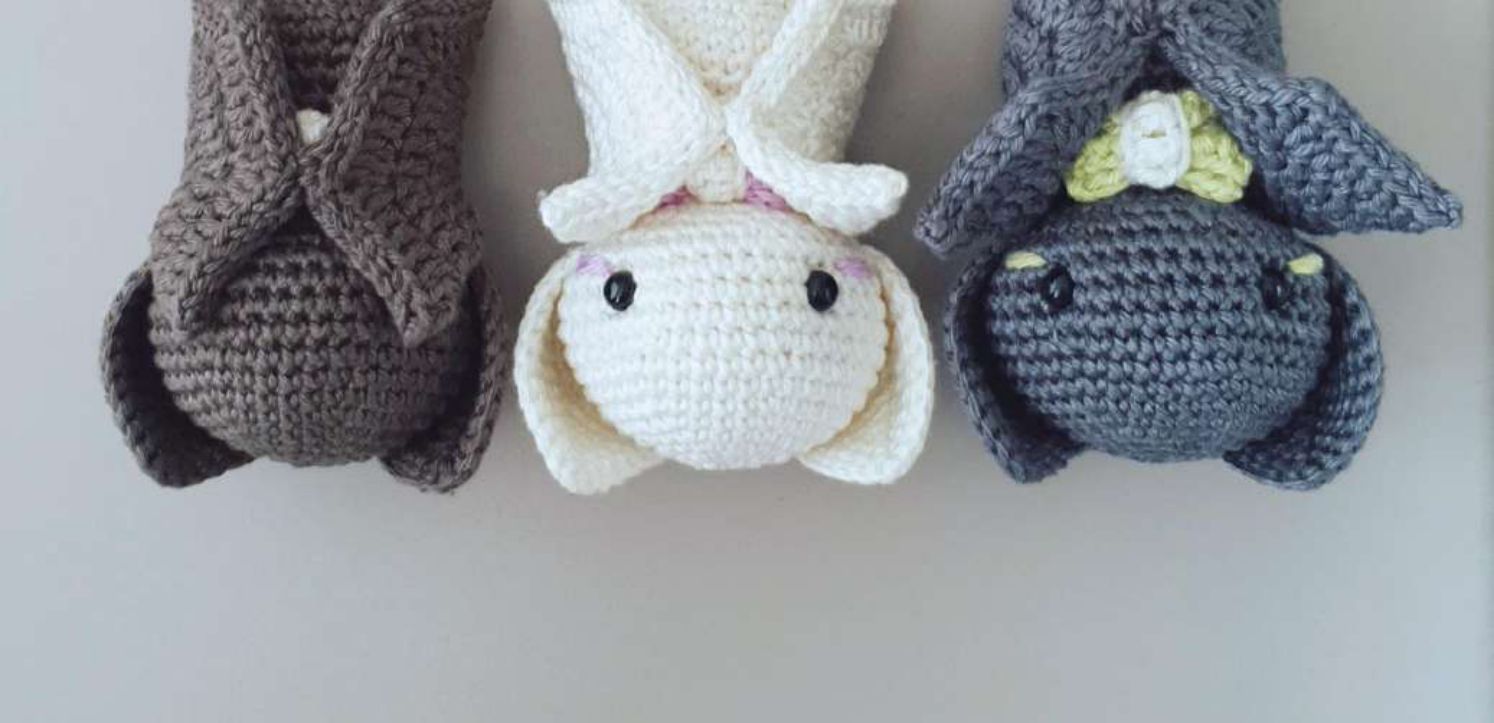
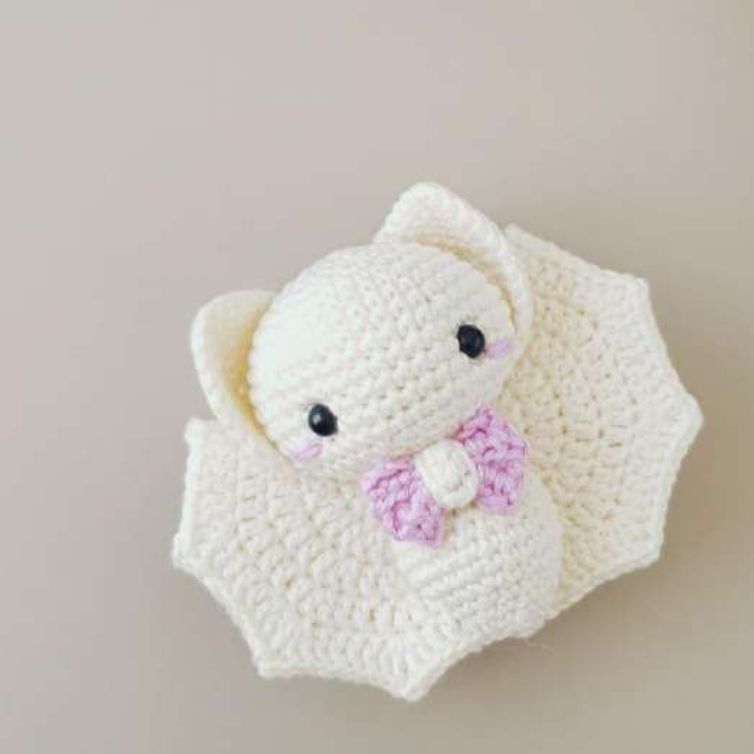
Meet the Baby Bat: a small amigurumi bat with a round head, pointy ears, folded scalloped wings and an oversized bow tie. He is more cute than spooky, which makes him a sweet Halloween make for a shelf, a gift basket or anyone who loves bats.
This free crochet bat pattern has every round written out below, with step by step photos for stuffing the head, embroidering the blush, shaping the wings and placing the ears. Prefer paper? Download the free printable PDF, which has all the photos too.
Materials
- Mercerized cotton, about 25 g in your main color. He is shown in Anthracite (501); Dark Olive (387) and Bridal White (105) look lovely too.
- A small amount of an accent color for the blush and bow tie, such as Lime Juice (392), Apricot (524) or Light Orchid (226)
- A small amount of white for the bow tie knot
- A 2.25 mm crochet hook, or the hook that suits your yarn
- 6 mm safety eyes (with a bigger hook and yarn you may need larger eyes)
- Stuffing, a tapestry needle, pins and scissors
Skill level and gauge
This is an intermediate pattern. You work in the round with increases and decreases, make double crochet wings and sew the pieces together. The step photos guide you through the shaping and the placement of the ears and wings.
There is no set gauge for this bat. What matters is even tension: keep your single crochet and your double crochet just as tight as each other, so the wings match the body. Only make very tight single crochet if you can make equally tight double crochet.
Abbreviations (US terms)
| MR | magic ring |
|---|---|
| ch | chain |
| sc | single crochet |
| hdc | half double crochet |
| dc | double crochet |
| inc | increase: 2 sc in the same stitch |
| dec | decrease: sc 2 stitches together |
| 3sc | 3 sc in the same stitch |
| 2sc | 2 sc in the same stitch |
| dc inc | 2 dc in the same stitch |
| 2dc ch2 2dc | 2 dc, ch 2 and 2 more dc, all in the same stitch |
| slst | slip stitch |
| FO | fasten off |
New to working in the round or to the magic ring? Our free crochet stitch guide shows both with step by step photos.
Pattern
The number in brackets at the end of each round is your stitch count. Make the head first, then the body, ears, wings and bow tie, and put him together at the end.
Head
- StartIn your main color, make 6 sc in a magic ring. (6)
- Round 1Inc in each stitch around. (12)
- Round 2(sc, inc) 6 times. (18)
- Round 3(sc 2, inc) 6 times. (24)
- Round 4(sc 3, inc) 6 times. (30)
- Round 5(sc 4, inc) 6 times. (36)
- Rounds 6 and 7Sc in each stitch around. (36)
- Round 8(sc 5, inc) 6 times. (42)
- Rounds 9 to 12Sc in each stitch around. (42)
Place the eyes. Count 7 stitches back from your hook and 2 rows up, between rounds 10 and 11, and push the first safety eye through. Count 10 stitches back and place the second eye. You should have 8 visible stitches between the eyes. Do not add the backs yet: they make the next round hard to crochet.
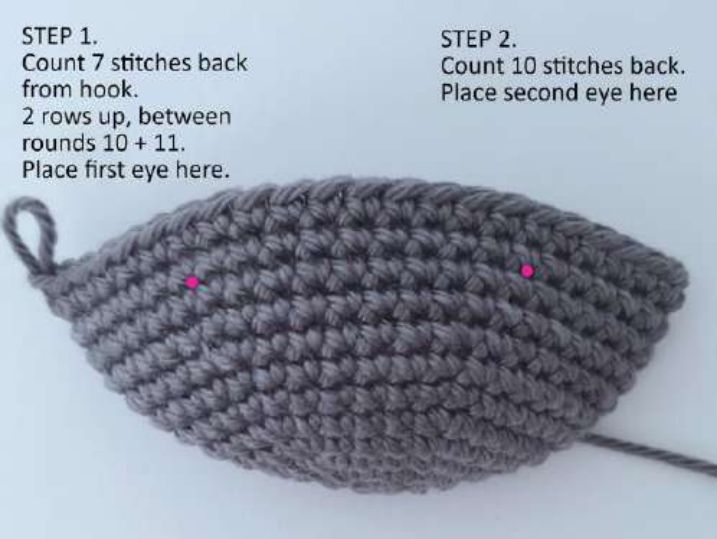
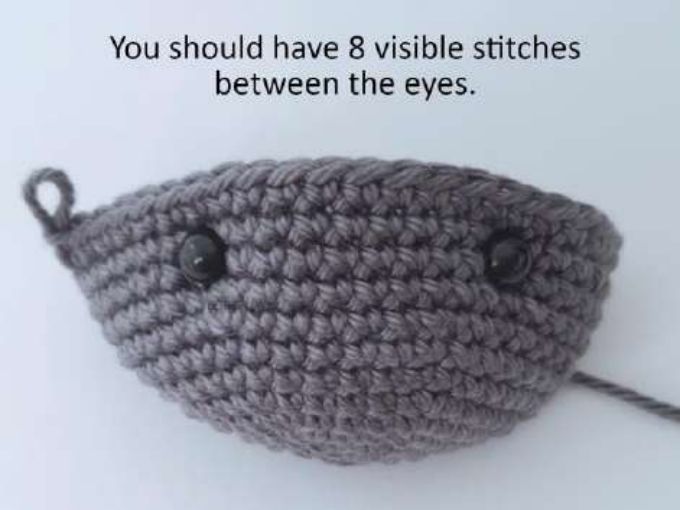
- Round 13(sc 4, dec) 7 times, then stuffing step 1. (35)
- Round 14(sc 3, dec) 7 times, then stuffing step 2. (28)
- Round 15(sc 2, dec) 7 times. (21)
- Round 16(sc, dec) 7 times, then stuffing step 3. (14)
- FinishSlst, fasten off and weave in the tail.
- After round 13: put the backs on the safety eyes and begin to stuff. Tuck plenty of stuffing above the eyes; it keeps them looking straight and forward later.
- After round 14: stuff rounds 12 and above, and gently pad out the area between and around the eyes. Do not stuff too firmly yet.
- After round 16: add stuffing a little at a time until the head is nicely rounded. Take care not to move the eyes, and do not overstuff the decrease rounds.
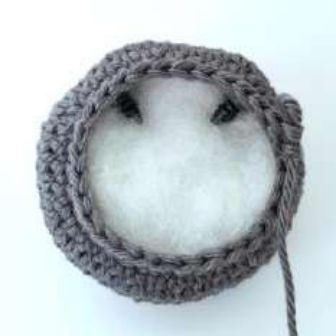
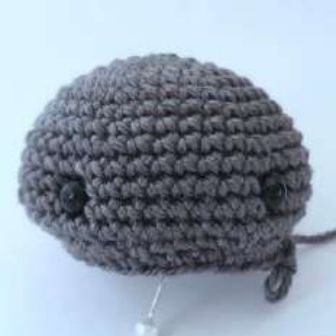
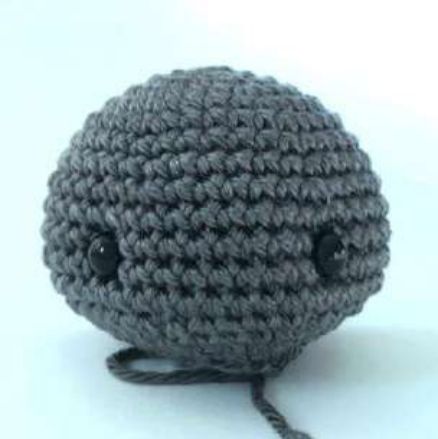
Take your time stuffing and shaping the head. It is worth it for that cute face! When you are happy with the shape, embroider the blush.
Blush
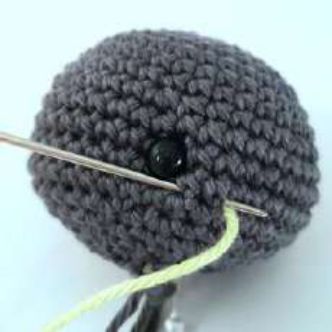
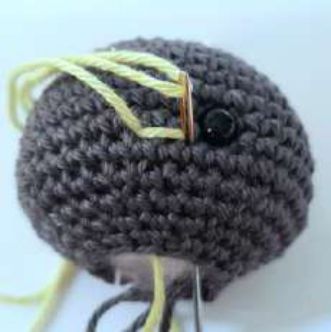
- Insert your needle through the opening at the bottom of the head and bring it out two stitches back from the eye, between rounds 11 and 12.
- Embroider over those two stitches once, then take the needle back in next to the eye and out through the opening.
- Repeat on the other side.
- Tie the ends together securely inside the head and trim.
Body
- StartContinue with your main color and make 6 sc in a magic ring. (6)
- Round 1(inc, sc) 3 times. (9)
- Round 2(inc, sc 2) 3 times. (12)
- Round 3(inc, sc 3) 3 times. (15)
- Round 4(inc, sc 4) 3 times. (18)
- Round 5(inc, sc 2) 6 times. (24)
- Rounds 6 to 8Sc in each stitch around. (24)
- StuffBegin to stuff the body. From here, stuff as you go.
- Round 9(dec, sc 6) 3 times. (21)
- Round 10Sc in each stitch around. (21)
- Round 11(dec, sc 5) 3 times. (18)
- Round 12(sc 3, dec, sc 2, dec) 2 times. (14)
- FinishSc in the next 3 stitches and slst in the next. Cut the yarn, leaving a long tail for sewing, and pull through.
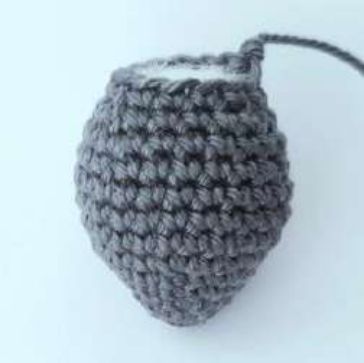
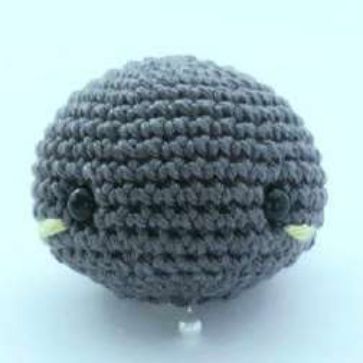
Join the head and body. Stuff the body firmly so it keeps its shape. Line up the slst on the body with the slst on the head, then sew the head and body together through the front loops only.
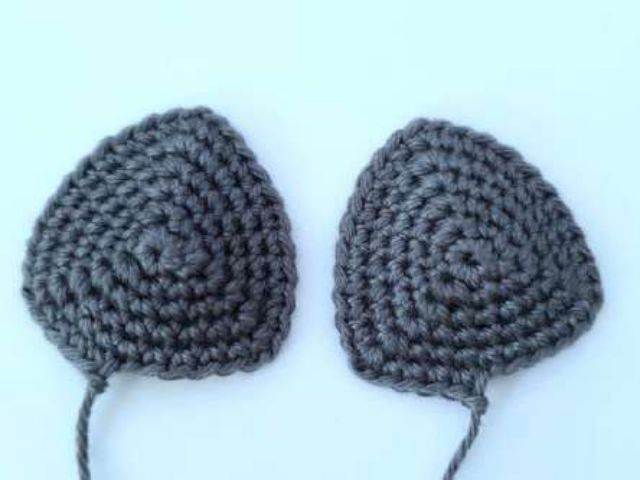
Ears (make 2)
- StartMake 6 sc in a magic ring. (6)
- Round 1(3sc, sc) 3 times. (12)
- Round 2Sc, (3sc, sc 3) 2 times, 3sc, sc 2. (18)
- Round 3Sc 2, (3sc, sc 5) 2 times, 3sc, sc 3. (24)
- Round 4Sc 3, (3sc, sc 7) 2 times, 3sc, sc 4. (30)
- Round 5Sc 4, (2sc, sc 9) 2 times, 2sc, sc 4, slst. (33)
- FinishCut the yarn, leaving a tail of about 40 cm (16 in), and pull through. Make a second ear.
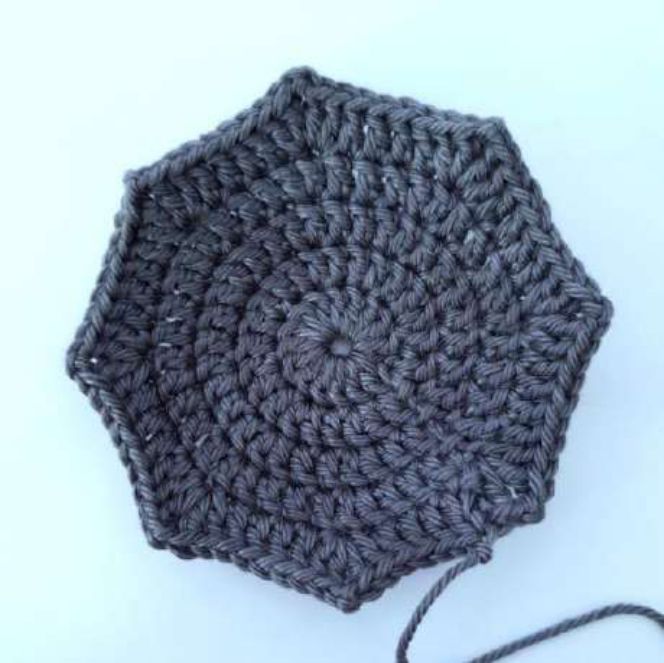
Wings (make 2)
Ch 3 counts as 1 dc. Dc inc means 2 dc in the same stitch. 2dc ch2 2dc means 2 dc in the next stitch, ch 2, then 2 more dc in the same stitch.
- StartMake a magic ring.
- Round 1Ch 3, dc 15 into the ring, slst into ch 2. (16)
- Round 2Ch 3, dc in the same ch 2 space, (dc, dc inc) 7 times, dc, slst in ch 2. (24)
- Round 3Ch 3, dc in the same ch 2 space, (dc 2, dc inc) 7 times, dc 2, slst in ch 2. (32)
- Round 4Ch 3, dc in the same ch 2 space, (dc 3, dc inc) 7 times, dc 3, slst in ch 2. (40)
- Round 5Ch 3, dc in the same ch 2 space, ch 2, 2 dc in the same space, then (dc 4, 2dc ch2 2dc) 7 times, dc 4, slst in ch 2. (80)
- FinishCut about 60 cm (24 in) of yarn and pull through.
Shape the wing. Fold the circle in half to make the wing shape, and be sure the ch 2 points match on both sides. Sew the halves together through the back loops only. When you reach the end, thread your needle back through the wing to your starting point.
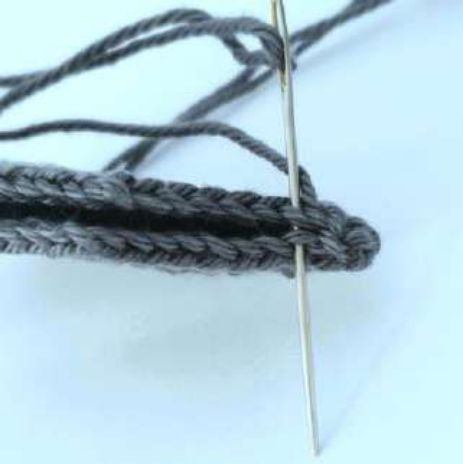
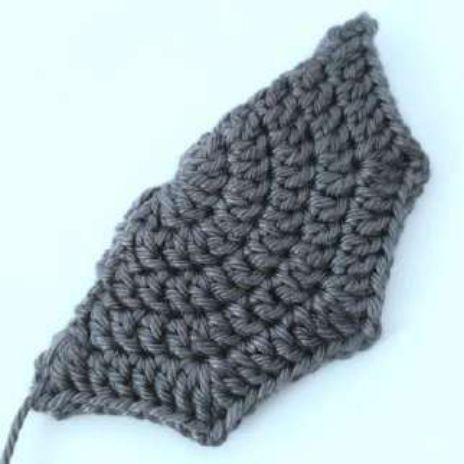
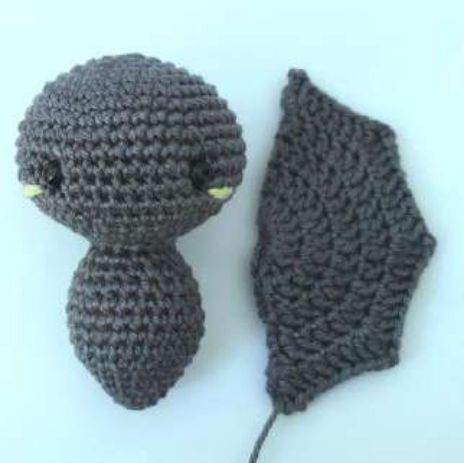
Keep your double crochet neat and compact. The finished wing should be almost as tall as the head and body together; small differences do not matter. If your wing is much larger, try a smaller hook.
Bow tie
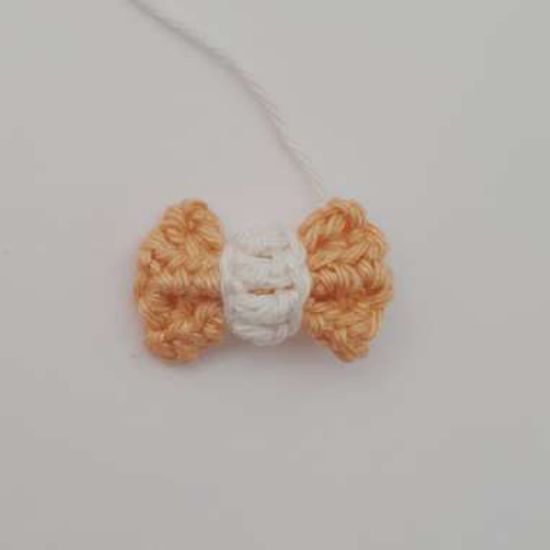
The bow tie should look slightly oversized: about as wide as the space across the eyes. Add or remove chains, or change your hook, if you need to.
In your accent color:
- Row 1Ch 8, hdc in the 3rd ch from the hook and in each chain across. (6)
- Rows 2 to 4Ch 2, turn, hdc in each stitch (4 rows in total). (6)
- FinishFasten off and weave in the ends.
In white, for the knot:
- StartCh 7, leaving a 10 cm (4 in) tail.
- Row 1Dc in the 3rd ch from the hook and in each chain across. (4)
- FinishSlst into ch 1, cut the yarn leaving 10 cm (4 in), and pull through.
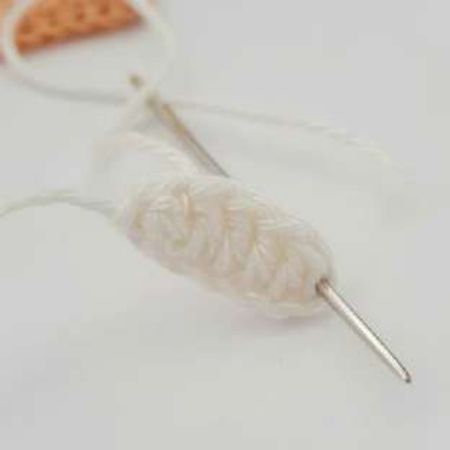
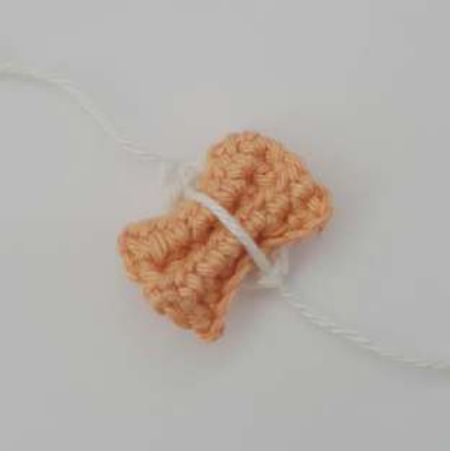
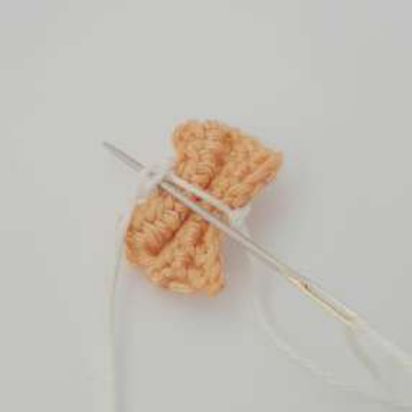
- Thread the chain tail through the middle of the opposite end, making a loop at the back.
- Pinch the colored piece, place it face down inside the loop and pull gently.
- Thread your ends through the middle loops on the opposite side, pull tight and knot. Weave in and trim one end, and keep the other for sewing.
Assembly
Ears
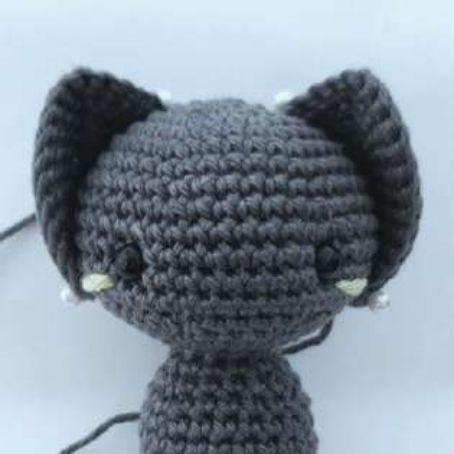
- Point A: place the front corner of the ear in the second stitch back from the blush, one row down, between rounds 12 and 13.
- Point B: place the back corner between rounds 8 and 9, about 3 stitches apart.
- Point C: gently pinch the top tip of the ear, flatten it against the head and pin between rounds 3 and 4.
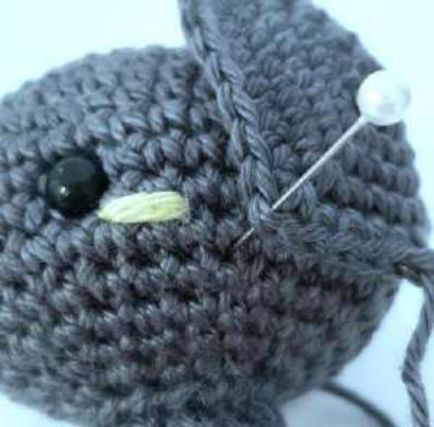
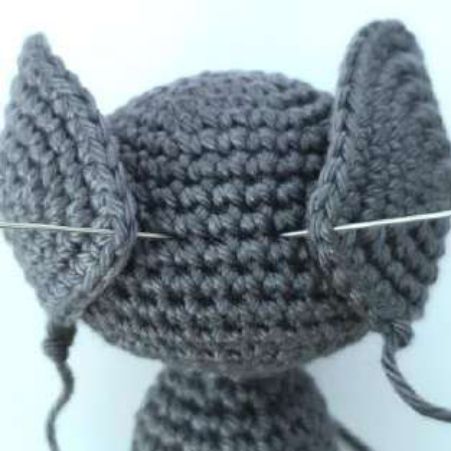
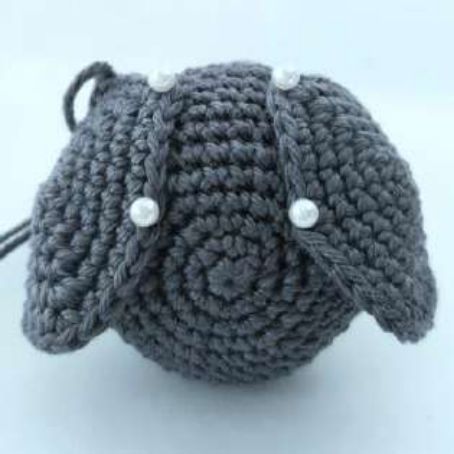
Always check how the ears look from the front before you sew. If they need adjusting, try point C first: pinning or unpinning a stitch or two often fixes it. If that does not help, keep point A where it is and adjust points B and C.
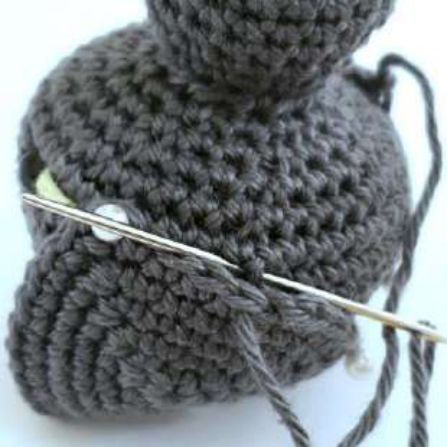
To sew, pick up both loops of the ear and go directly under the matching stitch on the head. Pull tight for a neat finish and work through every stitch, then fasten off out of sight and weave in the end.
Wings
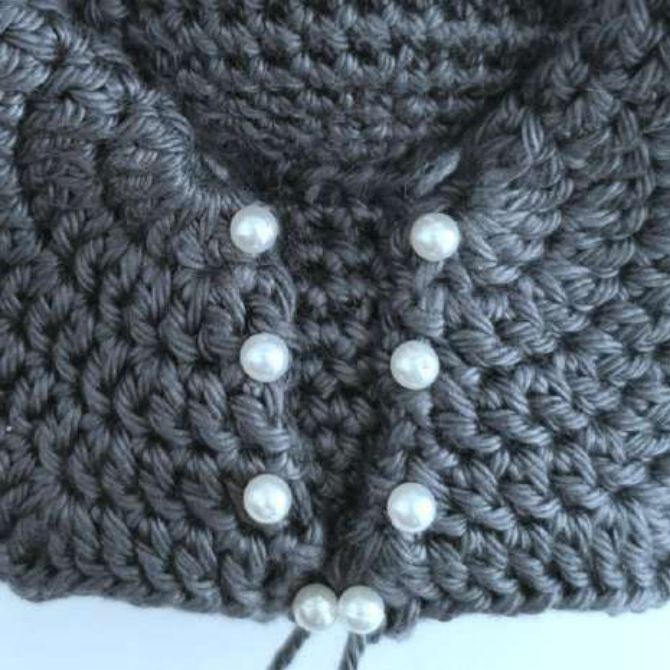
On a small bat like this one, the pins poke out through the body. Handle him with care until the pins are out.
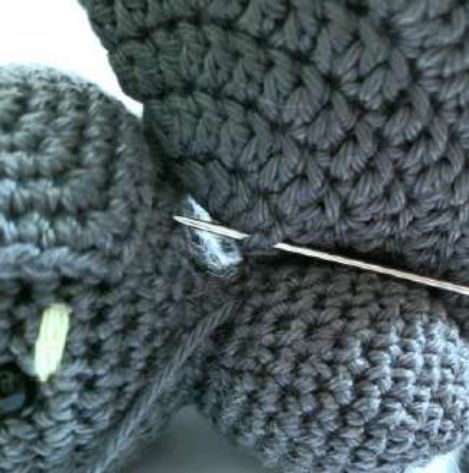
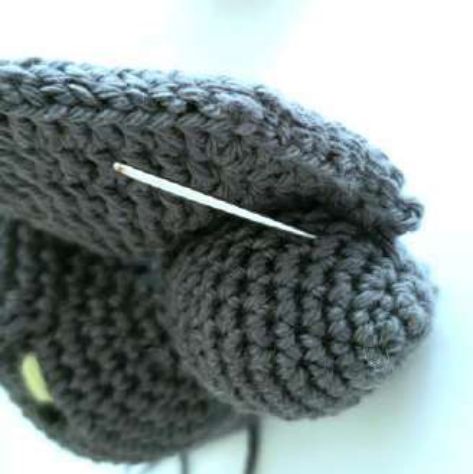
Pin the wings to the body in a narrow V shape. The starting rings sit where the body meets the head, 3 to 4 stitches apart. The head will be in the way, so bend each wing back a little to get the position right. The bottom points of the wings meet towards the tail.
Sew each wing from the bottom up, the same way you sewed the ears. One stitch every 2 to 3 body rows is enough.
Once the top is secure, bring your needle out at the side of the body, roughly in line with the ear. Pick up a stitch from the wing, attach it to the body and pull tight. Work down towards the bottom of the body, pick up another stitch from the wing, attach it and pull tight. Fasten off out of sight and weave in the end.
Bow tie
Sew the bow tie on between the 2nd and 3rd rows below the head.
He is probably a little squashed from all that sewing! Gently squish him back into shape with your fingers, and your baby bat is done.
Tips for a perfect bat
- Keep your tension the same in single and double crochet, so the wings match the body.
- Stuff the head a little at a time, with plenty above the eyes, so they look straight ahead.
- Check the ears from the front before sewing; a small change at point C makes a big difference.
- Try other colors: a brown or cream bat with an orchid or apricot bow tie looks adorable.
Questions
Is this bat pattern good for beginners?
It is an intermediate pattern. If you can crochet in the round with increases and decreases and make double crochet, you can make it. The step photos guide you through the shaping, the ears and the wings.
What yarn and hook do I need?
Mercerized cotton and a 2.25 mm hook: about 25 g in your main color, plus small amounts of an accent color and white. Another yarn works too, with the hook that suits it; you may need larger safety eyes.
How do the wings get their shape?
Each wing starts as a flat double crochet circle with seven points. You fold it in half with the points matching and sew it closed through the back loops.
Can I sell the bats I make?
Yes. You are welcome to sell the finished bats you make from this pattern, and a credit to Crochet Simplified with a link to crochetsimplified.com is appreciated. Please do not share, copy or sell the pattern itself.
Is there a printable version?
Yes. The free PDF has the whole pattern with all the step photos. Download it, open it on your phone or print the pages you need.
Using this pattern
This pattern is for your personal use. You may not copy, share, translate, resell or publish this pattern or its photos, in print or online, in whole or in part, free or paid.